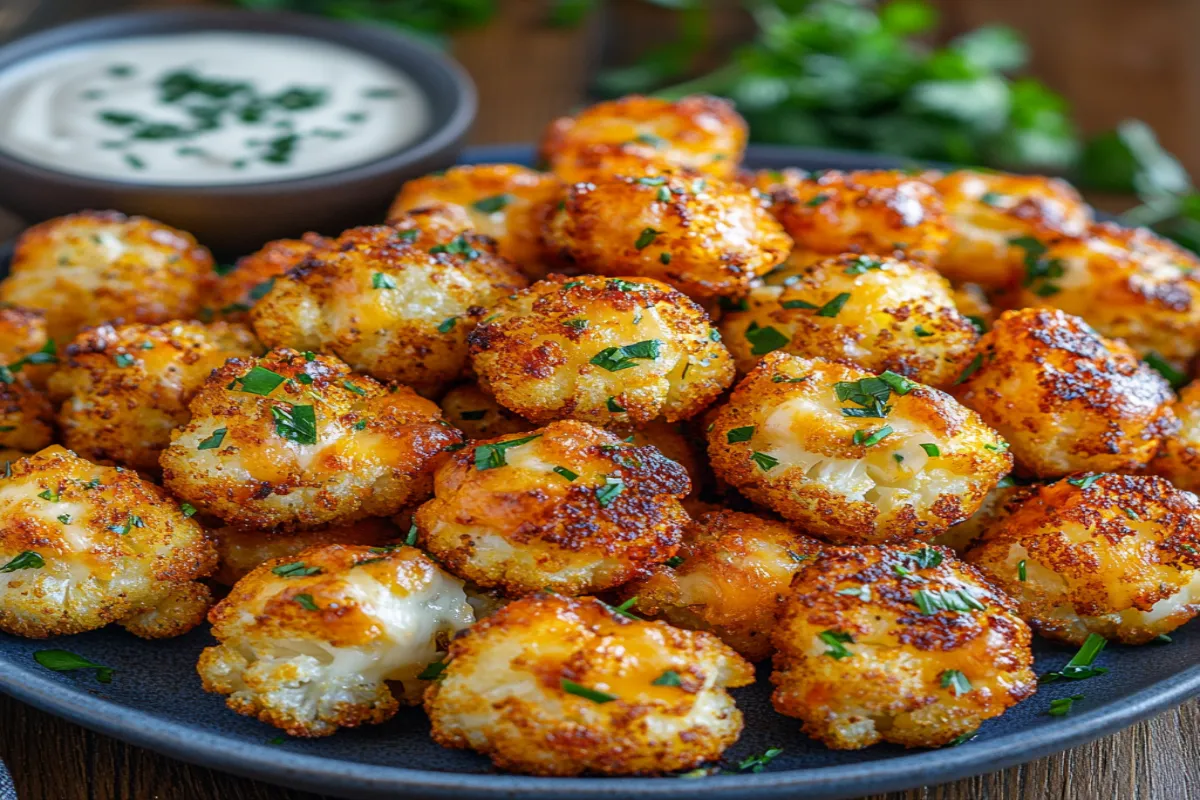
Cheesy Cauliflower Snack Bites -Healthy & Delicious Recipe
Table of Contents
In a world where healthy eating often means sacrificing flavor, these cheesy cauliflower bites stand as delicious proof that nutritious can be absolutely irresistible. Imagine biting into a golden-brown morsel that’s crispy on the outside, tender on the inside, and bursting with melted cheese in every bite. These aren’t your typical veggie snacks that you endure for health reasons – they’re genuinely crave-worthy treats that happen to be packed with nutrients and surprisingly low in carbohydrates.
What makes these cauliflower bites truly special is their incredible ability to satisfy both your taste buds and your nutritional goals simultaneously. The magic happens when tender cauliflower transforms through careful preparation into bite-sized nuggets that deliver the comfort food satisfaction of traditional fried snacks without the guilt. Crispy edges give way to creamy, cheesy centers that make you forget you’re eating vegetables, while the natural sweetness of cauliflower provides the perfect backdrop for savory seasonings and melted cheese.
Whether you’re trying to sneak more vegetables into your family’s diet, looking for satisfying low-carb alternatives, or simply want a crowd-pleasing appetizer that disappears as quickly as you can make it, these oven-baked cauliflower bites check every box. They’re sophisticated enough for adult palates yet kid-approved, making them the rare recipe that brings everyone to the table with genuine enthusiasm.
Why You’ll Love These Cauliflower Snack Bites
Irresistible Flavor and Texture Combination
The genius of these cauliflower bites lies in their masterful balance of textures and flavors that create an eating experience far more satisfying than you’d expect from a vegetable-based snack. The exterior develops a beautiful golden-brown crust during baking, providing that essential crunch factor that makes snack foods so appealing. This crispy shell gives way to a tender, almost creamy interior where the cauliflower’s natural mild sweetness mingles with rich, melted cheese.
The seasoning blend elevates the humble cauliflower into something truly special. Garlic powder and onion powder provide aromatic depth without overwhelming the delicate vegetable, while smoked paprika adds subtle warmth and a hint of sophisticated smokiness. These seasonings don’t mask the cauliflower’s flavor but rather enhance its natural characteristics, creating a harmonious blend that feels both familiar and exciting.
The cheese component deserves special mention for its crucial role in both flavor and texture. A combination of sharp cheddar and mild mozzarella creates the perfect balance – the cheddar contributes bold, tangy flavor that prevents the bites from being bland, while mozzarella provides that satisfying cheese pull and creamy mouthfeel that makes each bite feel indulgent. When heated, these cheeses meld together and with the cauliflower to create pockets of gooey richness throughout each bite.
Remarkable Health Benefits Without Compromise
Cauliflower deserves recognition as one of nature’s most versatile and nutritious vegetables, and these bites showcase its potential beautifully. A single serving provides substantial amounts of vitamin C, vitamin K, and folate, while delivering impressive amounts of fiber that support digestive health and help maintain stable blood sugar levels. Unlike traditional fried snacks that leave you feeling sluggish, these bites provide sustained energy without the crash.
The low-carb nature of these bites makes them particularly valuable for those following ketogenic, paleo, or general low-carb lifestyles. While traditional breaded and fried snacks can contain 15-20 grams of carbohydrates per serving, these cauliflower bites typically contain fewer than 5 grams, allowing you to satisfy snack cravings without derailing your nutritional goals.
Cauliflower belongs to the cruciferous vegetable family, which means it contains powerful compounds called glucosinolates that support the body’s natural detoxification processes. These compounds, along with cauliflower’s high antioxidant content, contribute to overall health while you’re simply enjoying a delicious snack.
The protein from cheese and eggs helps make these bites more satisfying than typical vegetable snacks, providing the staying power that keeps hunger at bay between meals. This protein content also supports muscle maintenance and helps stabilize blood sugar levels, making these bites a smart choice for active individuals and anyone focused on balanced nutrition.
Unmatched Versatility for Every Occasion
These cauliflower bites adapt seamlessly to virtually any situation, making them one of the most valuable recipes in your repertoire. As an appetizer for dinner parties, they offer sophisticated flavor that impresses guests while accommodating various dietary preferences. Their attractive golden appearance and bite-sized nature make them perfect for serving on platters alongside other finger foods.
For families with children, these bites represent a victory in the ongoing battle to increase vegetable consumption. Kids who typically refuse cauliflower will eagerly reach for these cheesy, crispy nuggets, often asking for seconds before realizing they’ve just eaten a substantial serving of vegetables. The familiar flavors and textures make them non-threatening while the fun size makes them feel like special treats rather than required vegetables.
Busy parents will appreciate how these bites transform lunchbox packing from stressful to simple. They travel well, taste great at room temperature, and provide the nutrition and satisfaction that growing children need to fuel their active days. Unlike many processed snacks, these provide real nutrition while still feeling like a treat.
For meal prep enthusiasts, these bites offer incredible convenience. Make large batches on weekends and portion them into containers for grab-and-go snacks throughout the week. They reheat beautifully in the oven or air fryer, maintaining their crispy exterior and melty interior even after storage.
Ingredients Overview
Selecting and Preparing Perfect Cauliflower
The foundation of exceptional cauliflower bites begins with selecting high-quality cauliflower and preparing it properly. Fresh cauliflower heads should feel heavy for their size with compact, creamy white florets and bright green leaves. Avoid heads with dark spots, yellowing, or soft areas that indicate age or deterioration. The florets should be tightly packed without gaps or spreading that suggests the cauliflower is past its prime.
Frozen riced cauliflower offers excellent convenience and often superior consistency for this recipe. The freezing process breaks down cell walls slightly, which actually helps achieve the proper texture for binding. However, proper thawing and moisture removal become crucial steps when using frozen cauliflower. Thaw it completely in the refrigerator overnight, then squeeze out excess moisture using clean kitchen towels or cheesecloth.
Whether using fresh or frozen cauliflower, achieving the right texture requires careful attention to moisture content. Excess water is the enemy of crispy cauliflower bites, leading to soggy results that fall apart during baking. After steaming fresh cauliflower or thawing frozen varieties, spread the cauliflower on clean kitchen towels and pat thoroughly dry. Some cooks even let the cauliflower sit uncovered in the refrigerator for 30 minutes to allow surface moisture to evaporate.
The size of cauliflower pieces affects the final texture significantly. For fresh cauliflower, rice it using a food processor or box grater until pieces are roughly the size of coarse breadcrumbs. Pieces that are too large won’t bind properly, while pieces that are too fine can become mushy. The goal is achieving uniform sizing that allows for even cooking and proper binding with other ingredients.
Cheese Selection for Optimal Results
The cheese combination in these bites serves multiple purposes beyond flavor – it provides binding, moisture, richness, and that irresistible cheese pull that makes them so appealing. Sharp cheddar brings bold, tangy flavor that prevents the bites from tasting bland while contributing to the golden color during baking. The sharpness cuts through the mild cauliflower flavor without overwhelming it, creating perfect balance.
Mozzarella’s role focuses more on texture than flavor, providing the stretchy, melty quality that makes these bites feel indulgent. Low-moisture mozzarella works best for this application because it melts beautifully without adding excess liquid that could make the mixture too wet. Fresh mozzarella, while delicious, contains too much moisture for optimal results in this recipe.
The ratio of cheddar to mozzarella matters significantly. Too much cheddar can make the bites overly sharp and potentially grainy, while too much mozzarella can make them bland despite the pleasant texture. A ratio of approximately 60% cheddar to 40% mozzarella typically produces the best balance of flavor and texture.
Grating your own cheese rather than using pre-shredded varieties yields superior results. Pre-shredded cheese contains anti-caking agents that can interfere with melting and binding properties. Freshly grated cheese melts more smoothly and integrates better with the cauliflower mixture, resulting in more cohesive bites with better texture.
Consider the age and quality of your cheese as well. Higher quality cheeses generally melt better and provide more complex flavors that elevate the final dish. Aged cheddar offers more pronounced flavor than mild varieties, allowing you to use less cheese while achieving more impact.
Binding Agents and Texture Enhancers
Breadcrumbs serve dual purposes in these cauliflower bites – they help bind the mixture together while contributing to the crispy exterior texture that makes them so appealing. Plain breadcrumbs work best because they don’t compete with the carefully balanced seasonings, but the type and freshness of breadcrumbs significantly impact the final results.
Fresh breadcrumbs made from day-old bread provide superior texture and binding properties compared to store-bought dried versions. To make fresh breadcrumbs, pulse chunks of bread in a food processor until you achieve coarse crumbs. These fresh breadcrumbs absorb moisture better and create a more tender interior texture.
If using store-bought breadcrumbs, choose plain varieties without added seasonings or flavors. Italian-seasoned breadcrumbs might seem appealing, but they can create conflicting flavors with your carefully chosen seasoning blend. Panko breadcrumbs create extra crispiness but may require slight adjustments in quantity since they’re larger and absorb moisture differently than regular breadcrumbs.
The egg acts as the primary binding agent, helping hold all ingredients together during shaping and baking. Use large eggs at room temperature for best results, as they incorporate more easily with other ingredients. Cold eggs can cause the mixture to seize up or bind unevenly, leading to bites that fall apart during cooking.
Some recipes benefit from an additional binding boost, especially if your cauliflower mixture seems particularly wet or loose. A small amount of flour or almond flour can provide extra binding power without significantly affecting flavor. For gluten-free versions, almond flour or coconut flour work excellently while adding subtle nutty flavors that complement the other ingredients.
Seasoning Blend for Maximum Flavor Impact
The seasoning blend transforms simple cauliflower and cheese into something extraordinary, so each spice plays a crucial role in the final flavor profile. Garlic powder provides essential savory depth without the moisture that fresh garlic would add to an already delicate moisture balance. Use granulated garlic powder rather than garlic salt to maintain better control over sodium levels.
Onion powder contributes sweet, aromatic notes that complement the garlic while adding complexity to the overall flavor. Like garlic powder, it provides flavor impact without adding moisture that could affect the binding properties of the mixture. The combination of garlic and onion powders creates a savory foundation that enhances rather than masks the cauliflower’s natural flavor.
Smoked paprika deserves special recognition for its ability to add sophisticated depth and subtle heat without overwhelming other flavors. Unlike regular paprika, which primarily adds color, smoked paprika contributes complex smoky notes that make these bites taste more substantial and satisfying. Use it judiciously – a little goes a long way, and too much can make the bites taste overly smoky.
Dried parsley adds color and mild herbal notes that brighten the overall flavor while contributing to the attractive appearance of the finished bites. While fresh herbs might seem preferable, dried parsley works better in this application because it doesn’t add moisture and provides more concentrated flavor per volume.
Salt and freshly ground black pepper seem basic but play crucial roles in bringing all flavors together. Salt enhances every other flavor in the mixture while helping draw out some moisture from the cauliflower. Black pepper adds subtle heat and aromatic complexity that rounds out the seasoning blend perfectly.
Step-by-Step Preparation
Preparing Cauliflower to Perfect Tenderness
Begin by preparing your cauliflower to achieve the ideal texture for binding while maintaining enough structure to create satisfying bites. If using fresh cauliflower, remove leaves and cut the head into large florets, then pulse in a food processor until the pieces resemble coarse rice or small breadcrumbs. Avoid over-processing, which can create a paste-like texture that won’t hold together properly.
Steam the riced cauliflower until fork-tender but not mushy – typically 8-10 minutes depending on the size of your pieces. Proper steaming allows the cauliflower to soften sufficiently for easy binding while maintaining enough structure to create substantial bites. Overcooked cauliflower becomes waterlogged and mushy, making it impossible to achieve the proper texture.
The cooling and draining process requires patience but determines the success of your final product. Spread the steamed cauliflower on clean kitchen towels and allow it to cool completely while patting away surface moisture. Some cooks place the cauliflower in a fine-mesh strainer and press gently to remove excess liquid, or even squeeze it in clean kitchen towels to extract as much moisture as possible.
For frozen cauliflower, the process begins with proper thawing. Remove it from the freezer and thaw completely in the refrigerator overnight. Once thawed, the moisture removal becomes even more critical since frozen vegetables typically contain more water than fresh ones. Spread the thawed cauliflower on several layers of paper towels and press firmly to absorb excess moisture.
Consider letting prepared cauliflower sit uncovered in the refrigerator for 30-60 minutes after initial moisture removal. This additional drying time allows surface moisture to evaporate, creating ideal conditions for proper binding with other ingredients.
Mixing Technique for Perfect Consistency
Proper mixing technique ensures even distribution of ingredients while maintaining the texture necessary for cohesive bites that hold together during baking. Start with completely cooled, well-drained cauliflower in a large mixing bowl. Add the grated cheeses first, tossing gently to distribute evenly throughout the cauliflower.
Beat the egg lightly in a small bowl before adding it to the mixture. This ensures even distribution and prevents pockets of unmixed egg that could create weak spots in your bites. Pour the beaten egg over the cauliflower and cheese mixture, then use clean hands or a large spoon to mix gently but thoroughly.
Add breadcrumbs gradually while mixing, allowing them to absorb moisture and bind with other ingredients. The mixture should hold together when squeezed but not feel wet or sticky. If the mixture seems too dry and crumbly, add another beaten egg. If it seems too wet, add more breadcrumbs gradually until you achieve the right consistency.
Incorporate seasonings last to ensure even distribution without over-mixing. Sprinkle the spices over the mixture and fold gently until you can see even color throughout. Over-mixing at this stage can break down the cauliflower and make the mixture gluey.
Test the mixture consistency by forming a small portion into a ball. It should hold together without falling apart but not feel dense or heavy. The mixture should feel slightly moist but not wet, with visible pieces of cauliflower throughout rather than a smooth paste.
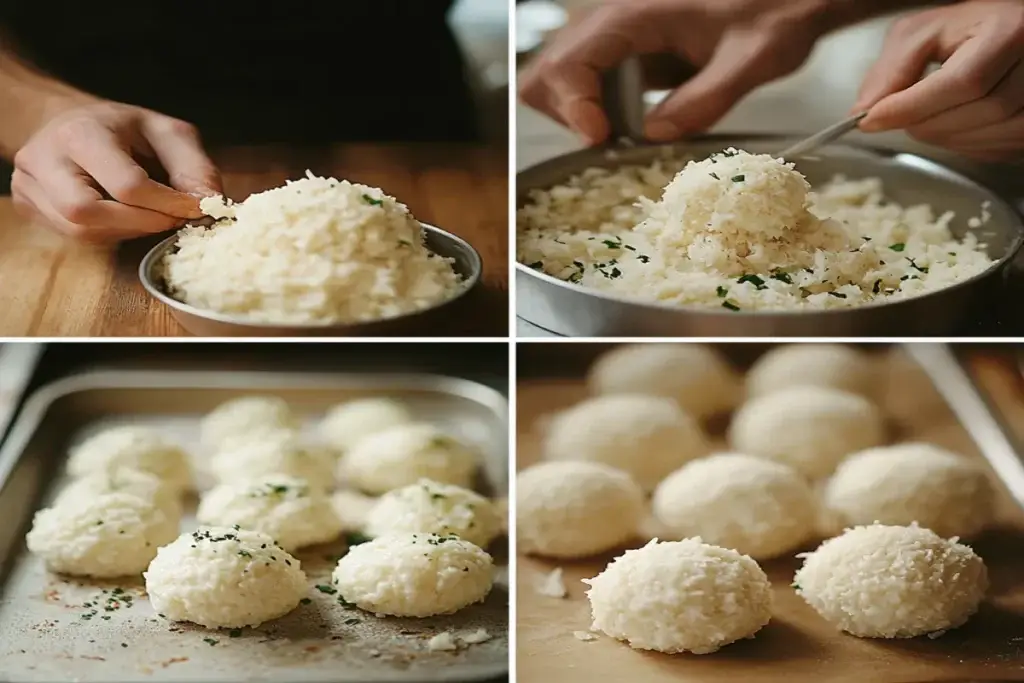
Shaping Techniques for Uniform Results
Shaping consistent bites ensures even cooking and professional presentation. Lightly oil your hands with olive oil to prevent sticking while handling the mixture. This simple step makes the shaping process much easier and helps achieve smooth, attractive surfaces on your bites.
Use a small cookie scoop or tablespoon to portion the mixture into uniform sizes. Consistency in sizing ensures that all bites cook evenly, preventing some from burning while others remain undercooked. Aim for portions roughly the size of large marbles or small ping-pong balls.
Roll each portion gently between your palms to create smooth, round shapes. Don’t squeeze too firmly, which can make the bites dense and heavy. The goal is creating cohesive shapes that will hold together during baking while maintaining light, tender interiors.
For variations in shape, you can form small patties instead of balls. Flatten each portion gently between your palms to create discs about half an inch thick. Patties offer more surface area for browning and can create slightly crispier results, though they may be more fragile during handling.
Place shaped bites on your prepared baking sheet with adequate spacing between each piece. Overcrowding prevents proper air circulation and can lead to uneven browning. Leave at least an inch between bites to ensure they develop crispy exteriors rather than steaming together.
Baking for Golden Perfection
Preheat your oven to 400°F (200°C) and position the rack in the center for even heat distribution. Line a large baking sheet with parchment paper and brush lightly with olive oil to prevent sticking and promote browning. The oil creates a barrier between the bites and the pan while contributing to the crispy exterior.
Brush the tops of shaped bites lightly with olive oil before baking. This additional oil helps achieve beautiful golden-brown color and contributes to the crispy texture that makes these bites so appealing. Use a pastry brush for even application, or spray lightly with cooking spray if you prefer.
Bake for approximately 15 minutes, checking at the 12-minute mark to assess browning. The bites should develop golden-brown color on the bottom before flipping. Use a thin spatula to turn each bite carefully, trying to maintain their shape while exposing the other side to direct heat.
Continue baking for another 8-12 minutes until both sides are golden brown and the bites feel firm when gently pressed. The exact timing depends on your oven, the size of your bites, and the moisture content of your mixture. Properly baked bites should be crispy outside and tender inside with melted cheese visible throughout.
Remove from the oven and let cool for 5 minutes before serving. This brief cooling period allows the cheese to set slightly, making the bites easier to handle while they’re still warm and at their most delicious.
Tips for Perfect Cheesy Cauliflower Bites
Mastering Moisture Control
The single most important factor in creating successful cauliflower bites is controlling moisture content throughout the preparation process. Excess moisture leads to bites that fall apart, fail to brown properly, or have soggy interiors that lack the satisfying texture that makes them appealing.
Start moisture control during the cauliflower preparation phase. After steaming or thawing, spread cauliflower on multiple layers of clean kitchen towels and press firmly to absorb surface moisture. Replace damp towels with dry ones and repeat the process until no more moisture transfers to the towels.
Consider salting the prepared cauliflower lightly and letting it sit for 15-20 minutes before pressing dry again. Salt draws out additional moisture while slightly concentrating flavors, but be sure to account for this added salt when seasoning the final mixture.
Some cooks achieve excellent results by spreading prepared cauliflower on a baking sheet and placing it in a 200°F oven for 5-10 minutes to evaporate surface moisture. This technique requires careful monitoring to prevent cooking the cauliflower further, but it can be effective for particularly wet batches.
Monitor the mixture consistency as you add ingredients. If the mixture seems too wet after adding eggs and seasonings, incorporate additional breadcrumbs gradually until you achieve the proper consistency. Don’t be afraid to adjust – it’s better to add more binding agents than to struggle with a mixture that won’t hold together.
Shaping Success Strategies
Proper shaping technique significantly impacts both the appearance and cooking success of your cauliflower bites. Clean, lightly oiled hands prevent sticking and allow for smooth, professional-looking results. Re-oil your hands as needed throughout the shaping process to maintain easy handling.
Work with small portions of mixture at a time, keeping the remaining mixture covered to prevent drying out. Exposure to air can form a skin on the surface that makes shaping more difficult and can affect binding properties.
Apply gentle, consistent pressure when shaping to create cohesive bites without compacting them too densely. Over-compacting creates heavy, dense bites that lack the light, tender texture that makes them so appealing. The mixture should hold together without feeling rock-hard.
Test your first few shaped bites by placing them on the baking sheet and observing whether they maintain their shape or begin to flatten or spread. If they lose their shape, the mixture may need more binding agents or the pieces may need to be shaped more firmly.
Consider chilling shaped bites in the refrigerator for 15-30 minutes before baking. This firming period helps them maintain their shape during the initial baking phase when the mixture is most fragile. Chilled bites are also less likely to stick to the spatula when flipping.
Achieving Maximum Crispiness
Creating beautifully crispy exteriors while maintaining tender interiors requires attention to several key factors. Proper oil application plays a crucial role – both the baking sheet and the bites themselves benefit from light oil coating that promotes browning without making them greasy.
Avoid overcrowding the baking sheet, which creates steam that prevents proper browning. Adequate spacing allows hot air to circulate around each bite, creating the dry heat necessary for crispy exteriors. If you have more bites than will fit comfortably on one sheet, use multiple sheets or bake in batches.
Resist the urge to flip the bites too early in the baking process. They need sufficient time to develop a crust on the bottom that will hold together when turned. Premature flipping can cause them to fall apart or lose their shape.
Consider finishing the bites under the broiler for the last 1-2 minutes of cooking to achieve extra browning and crispiness. Watch carefully during broiling to prevent burning, and rotate the pan if necessary to ensure even browning across all bites.
Some cooks achieve excellent results by starting the bites at 425°F for the first 8-10 minutes to encourage initial browning, then reducing to 375°F for the remainder of the cooking time. This technique promotes crispy exteriors while ensuring thorough cooking without burning.
Variations to Explore
Creative Cheese Combinations
While cheddar and mozzarella create the classic flavor profile, experimenting with different cheese combinations opens up exciting new taste possibilities. Provolone offers mild, smoky flavor that pairs beautifully with the smoked paprika while providing excellent melting properties. Its subtle complexity elevates the bites without overwhelming the cauliflower’s delicate flavor.
Gruyere brings sophisticated nutty notes and exceptional melting quality that creates incredibly creamy interiors. Its slightly sweet, complex flavor pairs particularly well with herbs like thyme or rosemary. Though more expensive than basic cheeses, a small amount of Gruyere mixed with less expensive varieties can dramatically improve the overall flavor profile.
Monterey Jack provides mild, creamy flavor with excellent melting properties, making it perfect for those who prefer less sharp cheese flavors. It works particularly well in combination with pepper jack for those who enjoy subtle heat, or with sharp cheddar for those who want creaminess with more pronounced flavor.
Aged Parmesan adds intense, nutty flavor and helps create extra-crispy exteriors due to its lower moisture content. Use it sparingly mixed with milder cheeses, as its strong flavor can easily overwhelm other ingredients. Freshly grated Parmesan provides the best results and melts more evenly than pre-grated varieties.
For those avoiding dairy, high-quality vegan cheese alternatives can work well in this recipe. Look for varieties specifically designed for melting, and expect slightly different texture and flavor profiles. Nutritional yeast can also add cheesy flavor while providing additional binding properties.
Flavor Enhancement Add-ins
Fresh or dried herbs can transform these basic bites into gourmet appetizers with minimal effort. Dried Italian seasoning blend adds classic Mediterranean flavors that complement the cheese beautifully. Fresh chives provide mild onion flavor and attractive green specks throughout the bites.
Finely minced fresh herbs like basil, oregano, or thyme add aromatic complexity, but use them sparingly to avoid overwhelming the delicate cauliflower flavor. Add fresh herbs at the very end of mixing to preserve their bright flavors and prevent bruising.
Finely diced vegetables can add nutrition, flavor, and visual interest. Minced bell peppers provide sweetness and crunch, while finely chopped sun-dried tomatoes add intense umami flavor and chewy texture. Keep additional vegetables to small amounts to avoid affecting the binding properties of the mixture.
Spice variations can completely change the character of these bites. A pinch of cayenne pepper adds gentle heat, while cumin and coriander create Mediterranean flavors. Asian-inspired versions might include ginger powder and sesame seeds, while Mexican variations could feature chili powder and lime zest.
Nuts and seeds provide textural contrast and additional nutritional benefits. Finely chopped toasted pine nuts add buttery richness, while sesame seeds contribute nutty flavor and attractive appearance. Keep additions small to maintain the proper texture and binding properties.
Alternative Cooking Methods
Air frying produces exceptionally crispy results with less oil than traditional baking. Preheat the air fryer to 375°F and cook the bites for 12-15 minutes, shaking the basket halfway through cooking. The circulating hot air creates superior browning and crispiness, though you’ll need to work in smaller batches.
Pan-frying creates beautifully golden exteriors with tender interiors, though it requires more attention than baking. Heat a thin layer of oil in a large skillet over medium heat and cook the bites for 3-4 minutes per side until golden brown. This method works particularly well for smaller batches or when you want extra-crispy results.
Grilling adds subtle smoky flavor while creating attractive grill marks. Use a grill basket or aluminum foil to prevent the bites from falling through the grates. Preheat the grill to medium heat and cook for 8-10 minutes, turning carefully to ensure even browning.
Some cooks achieve excellent results using a combination of methods – starting with a few minutes of pan-frying to develop initial browning, then finishing in the oven to ensure thorough cooking. This technique provides exceptional crust development while ensuring even cooking throughout.
Broiling creates intense browning but requires careful attention to prevent burning. Place the bites on the top rack and broil for 2-3 minutes per side, watching constantly. This method works best for finishing touches rather than primary cooking.
Frequently Asked Questions
Can I Use Frozen Cauliflower Successfully?
Frozen cauliflower works excellently in this recipe and often provides more consistent results than fresh cauliflower. The freezing process breaks down cell walls slightly, which actually helps achieve the proper texture for binding. However, proper thawing and moisture removal become absolutely critical when using frozen varieties.
Thaw frozen cauliflower completely in the refrigerator overnight rather than using quick-thaw methods that can create uneven texture. Once thawed, the moisture removal process becomes even more important than with fresh cauliflower. Frozen vegetables typically contain more water, so expect to spend extra time and effort removing excess moisture.
Spread thawed cauliflower on multiple layers of clean kitchen towels and press firmly to remove surface moisture. You may need to change towels several times to absorb all the excess water. Some cooks achieve excellent results by wrapping the thawed cauliflower in clean kitchen towels and squeezing gently to extract additional moisture.
Consider the texture differences when using frozen cauliflower. It may be slightly more tender than fresh varieties, which can actually make it easier to bind with other ingredients. However, this tenderness also means you need to handle the mixture more gently during shaping to prevent breaking down the cauliflower pieces.
The flavor of frozen cauliflower is virtually identical to fresh when properly prepared, so don’t hesitate to use it for convenience or availability reasons. Many cooks actually prefer frozen cauliflower for this recipe because of its consistent sizing and reliable results.
Making These Bites Gluten-Free
Creating gluten-free versions of these cauliflower bites is simple and doesn’t require significant changes to the basic recipe. Replace regular breadcrumbs with gluten-free breadcrumbs, panko, or almond flour for binding and texture. Each alternative provides slightly different characteristics but all work effectively.
Gluten-free breadcrumbs function almost identically to regular breadcrumbs and provide the most similar texture and appearance. Look for plain varieties without added seasonings to maintain control over the flavor profile. Some brands of gluten-free breadcrumbs can be slightly drier than regular versions, so you may need minor adjustments in liquid ingredients.
Almond flour creates slightly denser bites with subtle nutty flavor that many people prefer. Use finely ground almond flour rather than almond meal for the best texture. The natural oils in almond flour can enhance browning and contribute to crispy exteriors.
Crushed gluten-free crackers or cereal can provide interesting texture variations while maintaining the gluten-free status. Choose neutral-flavored options that won’t compete with your seasoning blend. This approach often creates slightly crunchier exteriors with unique textural appeal.
Always verify that all your ingredients are certified gluten-free, including seasonings and cheese, if celiac disease is a concern. Some seasoning blends and processed cheeses may contain gluten-containing additives or be processed in facilities that handle wheat products.
Storage and Reheating Best Practices
Proper storage maintains the quality and safety of leftover cauliflower bites while preserving their appealing texture for future enjoyment. Cool the bites completely before storing to prevent condensation that could make them soggy. Store in airtight containers in the refrigerator for up to five days.
Layer the bites between sheets of parchment paper in storage containers to prevent sticking and make removal easier. This technique also helps maintain their shape and prevents the bottoms from becoming soggy from contact with accumulated moisture.
For longer storage, these bites freeze beautifully for up to three months. Freeze them initially on baking sheets until solid, then transfer to freezer bags or containers. This prevents them from freezing together in clumps and allows you to remove only the quantity needed.
Reheating requires care to restore the crispy exterior while ensuring thorough heating throughout. The oven provides the best results – reheat at 350°F for 8-10 minutes until heated through and crispy. Avoid microwaving, which creates soggy exteriors and uneven heating.
Air fryers excel at reheating these bites, restoring crispiness better than conventional ovens. Reheat at 350°F for 5-7 minutes, shaking the basket halfway through. This method often makes day-old bites taste nearly as good as freshly made ones.
For frozen bites, you can reheat them directly from frozen, adding a few extra minutes to the reheating time. This convenience makes them perfect for meal prep and quick snack preparation throughout busy weeks.
Conclusion
These cheesy cauliflower bites represent the perfect marriage of health-conscious eating and uncompromising flavor, proving that nutritious choices don’t require sacrificing the foods you love. They deliver all the satisfaction of traditional fried snacks while providing genuine nutritional benefits and fitting seamlessly into various dietary approaches. The combination of crispy exteriors, melty cheese centers, and perfectly seasoned cauliflower creates an eating experience that rivals any processed snack food.
The versatility of this recipe makes it invaluable for modern lifestyles where convenience, nutrition, and taste all matter equally. Whether you’re serving them as elegant appetizers for dinner parties, packing them in lunchboxes for growing children, or preparing them for your own healthy snacking needs, these bites consistently deliver satisfaction and nourishment in every bite.
Beyond their immediate appeal, these cauliflower bites open doors to endless creativity in the kitchen. The basic technique provides a foundation for countless variations, allowing you to experiment with different cheeses, seasonings, and add-ins to create your own signature versions. Each batch becomes an opportunity to explore new flavors while maintaining the core principles that make them so successful.
The make-ahead friendly nature and excellent storage properties make these bites practical for busy schedules and meal prep routines. You can prepare large batches efficiently and have healthy, satisfying snacks ready whenever cravings strike or hunger calls.
Now it’s time to experience the magic of these cheesy cauliflower bites for yourself. Start with the classic version to master the technique, then let your creativity guide you toward personalized variations that reflect your taste preferences and dietary needs. Don’t be surprised when they disappear faster than you can make them – and don’t forget to share your own creative variations and success stories. These little golden nuggets of deliciousness have a way of converting even the most dedicated vegetable skeptics into enthusiastic fans.