Classic Fudgy Brownies Recipe – The Ultimate Gooey Brownie
Table of Contents
There’s something almost magical about that first bite of a perfect brownie—the way the crackly top gives way to a rich, gooey center that melts on your tongue and transports you instantly to chocolate heaven. Few desserts have achieved the universal adoration that brownies enjoy, crossing cultural boundaries and generational divides with their simple yet profound chocolate pleasure.
But not all brownies are created equal. While some prefer the lighter, cake-like variety, true brownie aficionados know that the holy grail lies in achieving that perfect fudgy texture—dense and rich, with an almost truffle-like center that doesn’t quite reach the point of being underbaked, yet remains gloriously moist and intense.
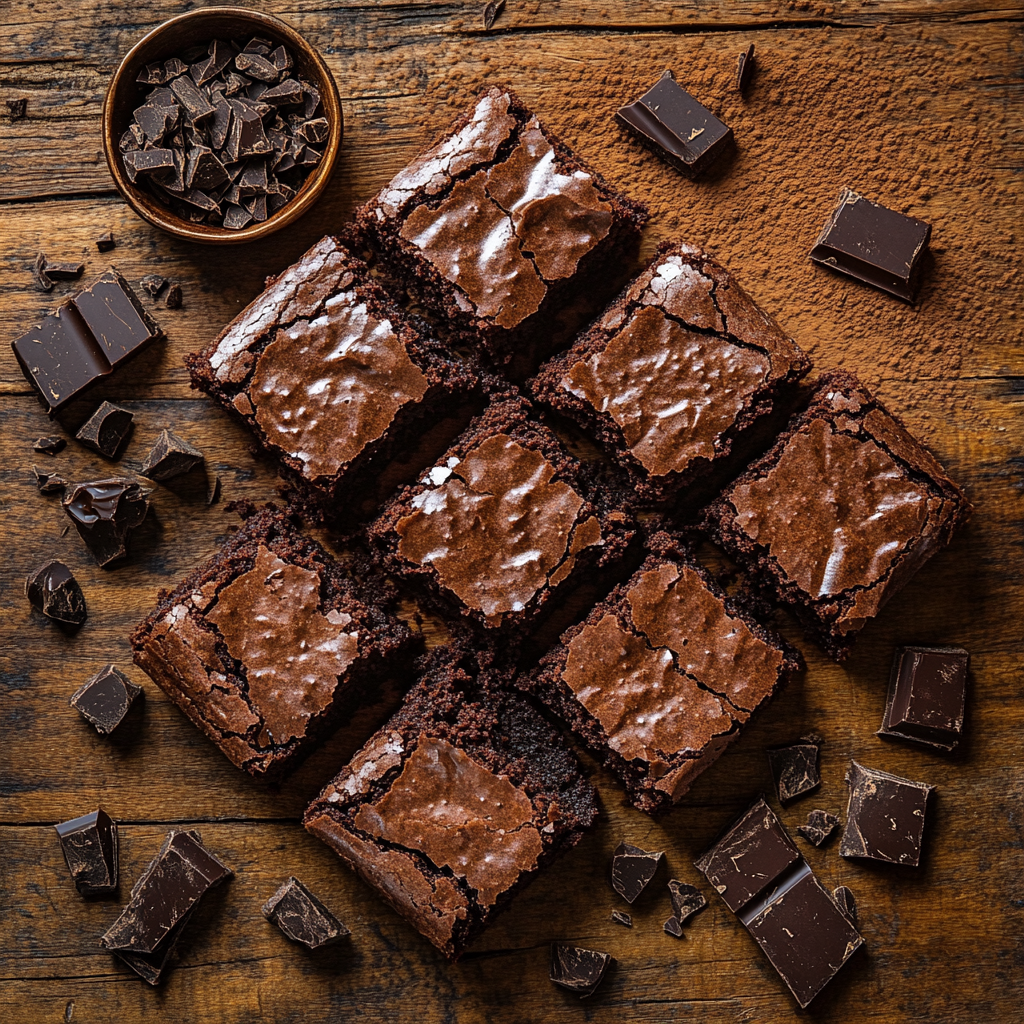
Today, I’m sharing my meticulously tested recipe for the ultimate fudgy brownies. These beauties boast a paper-thin crackly crust that shatters delicately with each bite, revealing a decadently rich chocolate interior that strikes the perfect balance between gooey and structured. Whether you’re a seasoned baker or a kitchen novice, this recipe will deliver chocolate perfection every time, earning you devoted fans and requests for the recipe wherever you share them.
The Science Behind Fudgy Brownies
Creating truly fudgy brownies isn’t just about following a recipe—it’s about understanding the delicate chemistry that happens in your mixing bowl and oven. The key lies in the careful balance of ingredients and techniques that favor density over rise.
The most critical factor is the fat-to-flour ratio. Unlike cakes that rely on a higher proportion of flour for structure, fudgy brownies flip this ratio, incorporating more fat (from butter and chocolate) and less flour. This higher fat content prevents the formation of gluten networks that would create a cakey texture, instead producing that dense, fudgy quality we’re after. Think of it as deliberately keeping the brownies “underdeveloped” in terms of structure.
Sugar plays a dual role in our brownies. Beyond providing sweetness, it’s essential for creating that coveted crackly top. When beaten with eggs, sugar dissolves and later rises to the surface during baking, drying out and creating that shiny, paper-thin crust. The more vigorously you beat the sugar and eggs, the more pronounced this crust becomes.
Speaking of eggs, they’re the unsung heroes of fudgy brownies. They provide just enough structure to hold everything together while contributing to richness and moisture. The proteins in egg whites help form that shiny top, while the fat in the yolks adds to the overall decadence.
Perhaps the most overlooked aspect of achieving fudgy perfection is baking time. Even a perfect recipe can be ruined by overcooking. The residual heat continues cooking brownies after they’re removed from the oven, so timing is crucial. The ideal moment to pull them from the oven is when the center is set but still soft—a toothpick inserted should come out with a few moist crumbs clinging to it, never completely clean.
Ingredients Breakdown
The beauty of brownies lies in their relatively simple ingredient list, but each component plays a vital role in achieving fudgy perfection.
Butter (3/4 cup, unsalted): Always opt for unsalted butter to maintain complete control over the salt level in your brownies. The butter should be good quality with at least 82% fat content for optimal texture. It contributes not only rich flavor but also critical fat for that fudgy consistency.
Chocolate (8 ounces): This is where quality matters tremendously. Choose a high-quality dark chocolate in the 60-70% cocoa range—high enough to provide deep chocolate flavor without overwhelming bitterness. Avoid chocolate chips designed to hold their shape when baked; instead, use chocolate bars or baking chocolate that will melt smoothly into the batter.
Granulated Sugar (1 1/2 cups): Regular white sugar creates the perfect balance of sweetness while contributing to that crackly top. Some recipes substitute portion with brown sugar for extra moisture, but this can diminish the classic crackly crust.
Eggs (3 large, plus 1 yolk): Eggs should be at room temperature to incorporate more easily and create better emulsion. The extra yolk adds richness without the additional moisture and protein of a whole egg that would make brownies cakey.
All-Purpose Flour (3/4 cup): Measured accurately—preferably by weight (90g)—to avoid adding too much, which would lead to drier, cakier results. The moderate protein content of all-purpose flour provides just enough structure.
Cocoa Powder (2 tablespoons, unsweetened): A small amount of cocoa powder intensifies the chocolate flavor without adding bulk to the recipe. Dutch-processed cocoa offers a smoother, deeper flavor, though regular unsweetened works well too.
Salt (1/2 teaspoon): Salt is chocolate’s best friend, enhancing its flavor and balancing sweetness. Don’t skip it, even if using salted butter—adjust the amount accordingly.
Vanilla Extract (1 teaspoon): Use real vanilla extract rather than imitation. It rounds out the chocolate flavor and adds depth to the overall taste profile.
Step-by-Step Preparation

Preparation and Melting
Begin by preheating your oven to 350°F (175°C) and lining an 8×8-inch square pan with parchment paper, leaving overhang on two sides for easy removal later. The parchment prevents sticking and makes cleanup simpler.
In a heatproof bowl set over a pot of barely simmering water (ensuring the bottom doesn’t touch the water), combine the butter and chopped chocolate. Stir occasionally with a silicone spatula until melted and completely smooth. Alternatively, microwave in 30-second intervals at 50% power, stirring between each interval. The key is gentle, low heat to prevent the chocolate from seizing or burning.
Remove from heat and let cool slightly—about 3-5 minutes—so it won’t cook the eggs when combined. The mixture should be warm but not hot to the touch.
Creating the Perfect Batter
In a large bowl, whisk the sugar, eggs, and egg yolk vigorously for a full 1-2 minutes. This isn’t just mixing—it’s creating the foundation for that crackly top. The mixture should lighten in color and become slightly thicker. Some bakers use a stand mixer with the whisk attachment for this step to incorporate more air.
Pour the cooled chocolate-butter mixture into the egg mixture in a steady stream while whisking constantly. This gradual incorporation ensures the eggs don’t scramble and the mixture remains smooth. Add the vanilla extract and continue whisking until fully combined.
In a separate bowl, whisk together the flour, cocoa powder, and salt to evenly distribute the ingredients and remove any lumps.
Add the dry ingredients to the wet mixture all at once and fold gently using a rubber spatula, making deliberate, sweeping motions until just combined. The moment you no longer see streaks of flour, stop mixing. Overmixing activates gluten, which leads to tough, cakey brownies—the enemy of fudginess.
If adding mix-ins like nuts or chocolate chips, fold them in now with minimal additional mixing.
Baking to Perfection
Pour the batter into your prepared pan and smooth the top with a spatula. For perfectly even brownies, tap the pan gently on the counter a few times to release any air bubbles.
Bake in the preheated oven for 25-30 minutes. This timing is crucial and varies by oven, so start checking at the 25-minute mark. The brownies are done when the edges look set and slightly pulled away from the sides, but the center still looks slightly underdone. A toothpick inserted about an inch from the edge should come out with a few moist crumbs—never completely clean, which would indicate overbaking.
The Critical Cooling Period
Place the pan on a wire rack and allow the brownies to cool completely in the pan—at least an hour, preferably two. This patience-testing step is non-negotiable, as it allows the residual heat to finish cooking the center while the structure sets. Cutting too soon results in messy, gooey (not in a good way) brownies that collapse.
Once fully cooled, use the parchment paper overhang to lift the entire brownie slab from the pan. With a large, sharp knife, cut into squares, wiping the blade clean between cuts for bakery-worthy presentation.
Tips for Perfect Brownies
The difference between good brownies and exceptional brownies often comes down to small details that make a big impact. First and foremost, resist the urge to overmix the batter after adding the flour. Once the dry ingredients hit the wet mixture, every additional stir develops gluten that will make your brownies tough and cakey rather than tender and fudgy. Use a light hand and stop the moment the flour disappears.
Lining your pan with parchment paper isn’t just about convenience—it’s essential for achieving perfect brownies. Beyond preventing sticking, it allows you to lift the entire slab out for even cutting and ensures the edges don’t overcook from direct contact with the hot pan.
The toothpick test requires nuance for brownies. Unlike cakes where a clean toothpick indicates doneness, brownies should cling to the toothpick slightly. Test about an inch from the edge—if it comes out with wet batter, continue baking for 2-3 minute intervals. If it comes out with a few moist crumbs, they’re perfect. If it comes out clean, they’re likely overbaked.
Perhaps most critically, allow sufficient cooling time before cutting. Even perfectly baked brownies need time to set their structure. For the cleanest cuts, refrigerate the fully cooled brownies for 30 minutes before slicing with a hot knife (run it under hot water and wipe dry between cuts).
Variations and Add-Ins
While these brownies shine in their pure chocolate glory, they also provide an excellent canvas for creative variations. For those who crave textural contrast, fold in 3/4 cup of roughly chopped walnuts or pecans just before baking. The slight bitterness of walnuts particularly complements the sweet, rich chocolate.
For maximum chocolate impact, add 1/2 cup of semi-sweet or dark chocolate chips to the batter. Unlike the chocolate in the base, these chips maintain their shape, creating pockets of melted chocolate throughout the brownies.
Swirl lovers can reserve 1/4 cup of brownie batter, then dollop 1/3 cup of creamy peanut butter, Nutella, or homemade caramel sauce on top of the batter in the pan. Use a knife to create beautiful marbled patterns throughout before baking.
For sophisticated flavor complexity, add 1/2 teaspoon of espresso powder (which enhances chocolate without adding coffee flavor) or 1 teaspoon of cinnamon to the dry ingredients. Alternatively, a tablespoon of bourbon or dark rum added with the vanilla creates brownies with subtle depth and warmth.
Serving Suggestions
While excellent on their own, these fudgy brownies reach new heights when properly accompanied. The classic pairing remains a scoop of high-quality vanilla ice cream alongside a warm brownie (just 10 seconds in the microwave revives day-old brownies beautifully). The temperature contrast between cold ice cream and warm brownie creates a sensory experience that’s greater than the sum of its parts.
For special occasions, transform these brownies into an elegant dessert by drizzling plates with warm ganache or salted caramel sauce before adding the brownie. A light dusting of powdered sugar or a sprinkle of flaky sea salt adds visual appeal and flavor complexity.
The beverage pairing can elevate your brownie experience significantly. A cold glass of whole milk provides classic comfort, while a properly pulled espresso or rich coffee brings out chocolate’s depth. For adult gatherings, consider a glass of ruby port or a fruity red wine like Zinfandel, whose berry notes complement chocolate magnificently.
Storage and Freezing Tips
These brownies stay remarkably fresh at room temperature for up to three days when stored in an airtight container. Place parchment paper between layers if stacking. For extended freshness during warmer months, refrigeration is recommended, though allow them to come to room temperature before serving for optimal texture and flavor release.
Brownies freeze exceptionally well, making them perfect for advance preparation. For best results, cool completely, then cut into individual squares. Wrap each brownie tightly in plastic wrap, then place them all in a freezer-safe container or ziplock bag. They’ll maintain quality for up to three months.
To thaw, unwrap and place on a plate at room temperature for about an hour. For that fresh-baked experience, warm individual brownies in a 300°F oven for 5-7 minutes.
Frequently Asked Questions
Can I use cocoa powder instead of chocolate? While you can make brownies with only cocoa powder, the texture won’t be the same. Real chocolate contains cocoa butter that contributes significantly to the fudgy texture. If substituting, use 3/4 cup cocoa powder plus an additional 3 tablespoons of butter for every 8 ounces of chocolate called for, but expect a slightly different result.
How do I achieve the crackly top? The secret lies in thoroughly beating the eggs and sugar until lightened in color and slightly thickened. This dissolves the sugar and creates a meringue-like top layer that crackles during baking. Using granulated rather than brown sugar also helps achieve this signature look.
Can I make these gluten-free? Absolutely! Since brownies rely less on gluten development than other baked goods, they adapt beautifully to gluten-free flours. A high-quality cup-for-cup gluten-free flour blend can be substituted directly for all-purpose flour with excellent results.
What’s the best way to cut brownies cleanly? For pristine cuts, refrigerate the fully cooled brownies for at least 30 minutes. Use a large chef’s knife dipped in hot water and wiped dry between each cut. For even more precision, measure and mark the top before cutting, and use a gentle sawing motion rather than pressing straight down.
The Perfect Brownie Awaits
The journey to brownie perfection isn’t complicated, but it does require attention to detail and an understanding of what creates that magical fudgy texture. By maintaining a high fat-to-flour ratio, being mindful of mixing techniques, and—perhaps most importantly—resisting the urge to overbake, you can create brownies that will become the stuff of legend among friends and family.
Remember that baking is both science and art. Don’t be afraid to make these brownies your own through creative add-ins or serving styles, but respect the fundamental principles that make them fudgy rather than cakey.
I’d love to see your brownie creations! Share photos on social media with #UltimateFudgyBrownies or leave a comment below describing your experience and any adaptations you tried. For more recipes that balance technical perfection with pure indulgence, subscribe to our newsletter and never miss a delicious update.